Let’s take a look at how to remove a honey bee nest without killing them. I have performed hundreds of bee removals in my life. Some have been very successful. Some have been complete failures. Let me help share a bit of the experience I have gained over the years so that you know how to remove a honey bee nest without killing them.
How to Remove Bees Without Killing Them
There are four broad types of bee removal we can perform. Each one of these is slightly different and requires different tools.
1) Catching A Swarm Of Bees
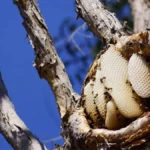
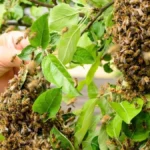
This is the easiest and in my opinion, the best type of bee removal to focus on if you are starting out. Beehives multiply their worker numbers in spring, and, if a hive is incorrectly managed, it will throw out a swarm or swarms. A swarm will settle on a tree or bush or some other structure. Scouts will then look for a new location for the swarm to build a beehive, and the bees will relocate there.
If you can catch the swarm at this point, you can then put them in a beehive and hive them. The great thing about catching a swarm is that you normally get paid for it, it is very little work, and you get the equivalent of a package of bees. You get paid to get a package of bees!!
Each person develops their own way to catch swarms – I just take a cardboard box or a bucket and place it under the swarm. I then give the swarm a good shake and they fall in the box or bucket. Place the container on the ground near where the swarm was and the bees will settle into it in a half-hour or so. That is of course if you got the queen to fall in the box. If not, they will go wherever she was.
2) Removing A Hive That Has Settled Recently
This is a little more complex than catching a swarm. A recently settled hive could be in any manner of locations. This could range from inside a post box, wooden crate, old drum, compost maker, roof, wall, upturned pot to almost anything you can imagine. I once removed a swarm of bees from a grotesque nude sculpture an artist had made of herself. This was disturbing given where the bees had entered the sculpture.
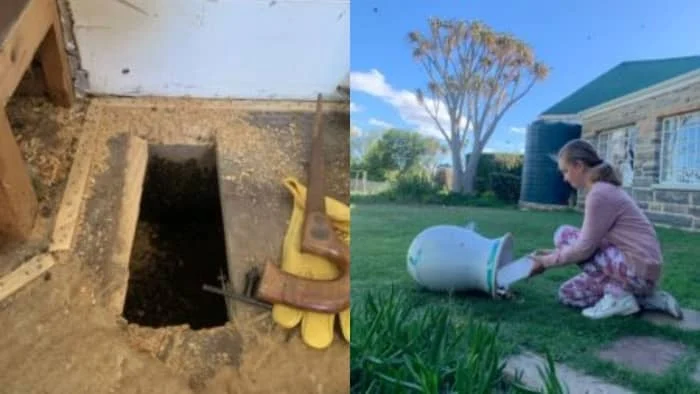
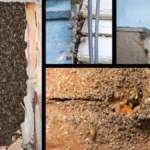
In these pictures, you can see a recently moved in a swarm of bees under some floorboards. Our 9-year-old fearless beekeeper, Ms.Chloe Bowker, scooped these out and placed them in a special ceramic beehive.
When we perform these removals I find the easiest is if you can get into the cavity where the bees are. Remove the few early combs they have made and shake the bees from here into a box. Scoop as many of the bees as you can out of the space and place them in a box. Place the box a distance away in a sunny place. Pump smoke into the cavity until the bees all fly out – they will then settle in the box. This is assuming you have managed to scoop the queen into the box.
3) Removing A Hive That Has Been In AÂ Spot For Many Months Or Years
This can be most unpleasant, or quite easy depending on where the bees are. A big strong well-established hive is an educational experience to remove. It can also be quite scary, so make sure you are ready and in the right headspace. Have lots of smoker fuel. A fire extinguisher and a plan in case something goes wrong.
Step 1 – Smoking The Hive
The first step is to smoke the hive. Always start by smoking the hive. This calms the bees. Smoke them a little more just to be careful. Then a bit more. Wild hives nest in places where the smoke can struggle to enter the hive. Smoking carefully prevents disasters. You are performing a service for clients taking bees. Make a show a bit and puff smoke all over. This helps to ensure that folks will actually feel they should pay you.
Step 2 – Inspecting The Hive
In this hive inspection, you are going to plan how to gain access to the hive. If the bees are in a space below a floor see if you can find a trap door to get into the crawl spaces. If they are in a ceiling, see if you can access them. If they are under a roof, see if you can access them, or lift a few roof sheets. If they are in a wooden box, inspect and see if it makes sense to move the entire box, or remove the bees first. There are an indefinitely huge number of options the bees can come up with about where they build nests. You need to inspect, and use judgment.
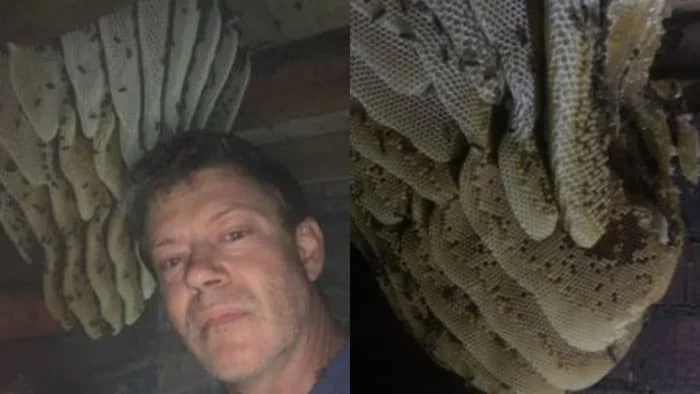
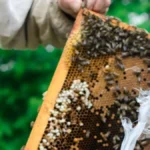
In this picture, you can see me inspecting the hive. It appeared to be a young swarm with a lot of fresh white comb. I made sure to get containers for the comb!!
If your inspection shows that the bees cannot be removed by opening the hive up, proceed to method 4.
Step 3: Opening The Hive Up
You have ascertained that you can access this hive. Smoke it again, open the hive. Have a number of buckets and trays present. Ask the landowner or homeowner for a big tray.
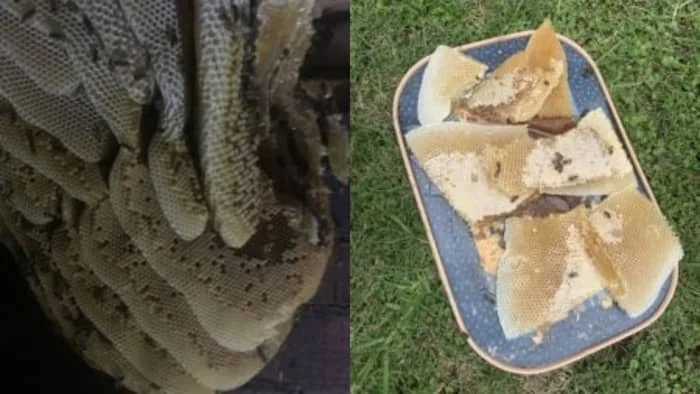
You can see the fresh brood combs visible in this hive, as well as the tray for Mrs. Emslie, who was so excited to share this golden comb with her friends. Always a nice way to get people excited about bees.
Start cutting combs from the hive- remove the nice white combs first and place a few of these on the tray for the client. I always keep some of these white combs for myself as well and place them in flat-bottomed crates. You cannot stack combs more than two layers deep – it will crush and collapse on itself.
As you move through the hive you will enter the pollen and brown combs. These combs can be placed in different containers. Next, you will find brood combs. Some bee removes will try to fix these into frames and put them in the new hive. I do not do this as you can bring mites, hive beetles, and diseases into your hive. Rather remove the bees and place them on a fresh foundation. Let them start fresh. Brood is good chicken food – if you find fresh brood in the white comb, fry it with garlic and butter – it is actually delicious!!
Step 4: Removing The Bees
After you have removed the combs, you can then leave the bees to clean themselves up. Come back a day or two later, and the hive will have clustered. You can now very easily scoop the bees into a box. I do not use bee vacuums but many of my friends use designs like this.
I normally just put my hand in the cluster and can feel where the queen is. I then grab her and place her in the box and the bees follow. This is a difficult skill to learn, and came at great personal cost to my hands in terms of stings!! If you want to learn this skill I will write about it in another article soon.
4) Removing A Hive That Has Been In A Spot For Many Years and Which Is Inaccessible
There are times when bees move into old historical buildings, or into places where opening the hive up can cause structural damage to buildings, trees, etc.
In this case, we perform a screen cone removal. For a screen cone removal, you will need to smoke the bees well. Then you can attach a large board over the hive. In the center of this board, you can drill a few holes and place one-way bee valves/porter bee escapes over the holes.
Seal the board to the wall with Polyurethane spray foam. You want the only exit for the bees to be through the bee valve. Place a weak beehive with a queen on the outside. Workers will leave the hive in the wall and will fly out to flowers. When they return, they will not be able to get through the bee valve and will eventually join the beehive on the outside. It is important to place the entrance of this hive close to the bee valves so that these lost workers make the mistake of thinking the other hive is theirs.
Within a few weeks, you will have transferred the majority of the hive to the new hive outside. The hive inside will starve and die, and the holes can be sealed up.
How To Repel Bees Without Killing Them
There are a few things that actually work here. Many people have stories about things that work, but my experience is that nothing works. After bees have been removed, you can place a long-lasting contact insecticide in a cavity to stop the bees from returning. Invariably, this pesticide will lose efficacy with time, the bees will return, and then you have a mess.
Rather fill any cavity that had bees in it with polyurethane foam. Bees nest in cavities – if there is no cavity, they cannot nest. Problem solved. There are no magic essential oils, sprays, surface treatments, or any other witchcraft or science that I have seen that stops bees from moving into a cavity.
I hope this article has helped you understand how to remove a honey bee nest without killing them. This is a broad field, and you just need to get out there and start practicing. You will have terrible disasters and great success. And most of all – you will have fun! Enjoy and share please if you enjoyed the article.
Honey Bee Nest Removal FAQs
Can honey bees be relocated without killing them?
Yes, honey bees can be relocated using humane methods like smoking and hive removal without causing harm.
Why is it important to avoid killing honey bees during nest removal?
Honey bees are essential for pollination and ecosystem balance, and killing them negatively impacts the environment.
What is the easiest way to remove a swarm of honey bees?
Catching a swarm early, before it builds a nest, is the simplest method. This typically involves shaking the swarm into a container and relocating it to a new hive.
How can I tell if a bee nest can be removed safely?
A nest that has recently settled is easier to remove than one that’s been in place for months or years. Assess the location and accessibility of the nest.
What tools are needed for removing a honey bee nest?
Common tools include a bee smoker, bee box or bucket, protective gear, and sometimes a bee vacuum for difficult extractions.
How do you smoke a bee hive during removal?
Smoke calms the bees and encourages them to stay inside the hive, reducing aggression and making the removal process safer.
What should I do with the honeycomb after removing the nest?
The honeycomb can be shared with the property owner, kept as food, or stored for the bees in their new hive.
What is a screen cone removal method?
This method involves attaching a one-way valve to allow bees to exit a nest but not re-enter. A weak hive with a queen is placed outside to capture the displaced bees.
Can bee nests in hard-to-reach places be removed without damage?
Yes, but it may require more complex techniques like the screen cone method, especially if the nest is inside walls or historical structures.
How can I prevent bees from returning to the same spot after removal?
Sealing off the nest area with polyurethane foam and ensuring there are no cavities will prevent bees from returning.

Dr. Garth A. Cambray is a Canadian/South African entrepreneur and beekeeper with 28 years of experience in apiculture and specializes in adding value to honey. His Ph.D. research developed a new advanced continuous fermentation method for making mead that has resulted in a number of companies globally being able to access markets for mead. His company, Makana Meadery, exports honey mead to the USA where it is available to discerning connoisseurs. He has also developed technologies to commercially manufacture organic honey vinegar in Zambia for export globally. He holds a few patents globally in the ethanol industry and believes in technology and knowledge transfer for human development and environmental sustainability. One of his proudest achievements is the fact that the wind farm he started at one of his old apiary sites has essentially made his hometown carbon neutral.


